Tuesday, September 3, 2013

DIY: Hanging Mason Jar Planter!

I think it's safe to say I have a problem


I can't stop buying plants, and here lately it's been house plants. So I've had to come up with some creative ways to place them around our home. We have also been very broke, so I've had to come up with ways to do it with things I already have on hand. A get a sense of pride when I finish these thrifty projects, and I think this one is my favorite!


And this is what you will need to make it!


A small plant (of course)
A piece of wood
A drill with a bit
A mason jar
Wire wrapping supplies
Marker

First you need to decide where on your board you want your jar to hang from


Mark two dots where your going to drill your holes. I marked mine right under the lip of my jar towards the middle so that the jar will cover the holes


And then drill your holes!


Now is time to prep your jar for planting. I didn't have any potting soil and I knew I needed some filler of sorts so I picked out a buch a pretty tiny quartz stones in our yard and put them in the bottom of my jar. It looks cool and will also help with drainage!


Now stuff your plant in the jar, doing as little damage as possible to the roots


Now it's time to wire wrap!


I used 20 gauge wire to wrap around the jar twice and cross the ends in the back  (make sure you leave a few inches of wire on either side)


Grab hold the cross (as close to the jar as possible) with your index finger and thumb


And then turn your hand upside down so that your thumb is now on top, crossing the wire 


And then twist it a few more times


Now your ready to attach your jar to your board, we are going to do that by putting the wire tails you left through your drill holes and twist then together in back like an action figure is tied to it's box


Then turn your board around


And twist the wires around each other like you did before


I twisted mine all the way to the ends and then coiled up the two wires twisted together


I had 20 gauge silver wire and a flimsy 16 gauge bronze wire, I wanted the look of the bronze but doubted its ability to hold the jar, so I used the silver wire and then covered it with the bronze wire for looks. I made one loop 


And wrapped the jar pulling the last wrap around through the loop and pulled it back the opposite direction making another loop and wrapped the last few inches around the back


And now you have hanging mason jar planter!


I attached a hanger to the back and hung it up in our living room


I'd love to see what you guys do with your mason jar planter!!


Thursday, August 22, 2013

Homemade Toliet Bowl Cleaner

I love making something out of things I already have on hand. I have to admit that I always feel a since of pride. We have been pretty tight on money this year after moving and getting married, so I've found myself very thrifty. I found this DIY on Pinterest, and now I'm giving it to you! 

You will need:


1/4 Cup Borax
1/4 Cup Baking Soda
1 Cup White Vinegar

It's super easy! Just mix it directly in the toilet bowl and stir with your toilet brush. Let it sit 15-20 minutes then brush a little to finish it off! 

Monday, August 19, 2013

DIY: Hanging Shelf Planter

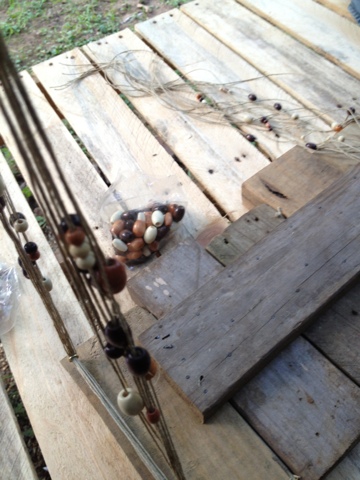
I recently acquired quite a few house plants and was running out of room for them so I had to get a little crafty. I used some of my husbands leftover wood pieces and made this hanging shelf planter.


All you need is this:


I put my beads on randomly and I think they came out nice. You of course could do a pattern if ya like.


I also tied the ends in little individual knots to ensure the knot would not slip out


Make sure you use one of these guys ^^!  Or you might end up with a shelf on your head!


At the last minute the hubs added a couple screws to make it extra sturdy. Since a lot of the pressure was near the ends.


I think it came out quite nicely! I'd love to see yours if you give it a try!


Monday, August 5, 2013

DIY Seed Starters : Phase 2

Hello friends! I'm back with the second phase for my DIY Seed Starters. It's been roughly two weeks since I made my lil Eco Friendly seed starters; and now they're ready to plant! 

This is the easy part! Since we made the seed starters out of cardboard (which is biodegradable) we can plant them right in the ground! (Or planter) yippee! I decided to cut the cardboard even with the soil before I planted, like so:


After you've cut the excess cardboard away your ready to plant!


I also removed the tape from the bottom as I planted each one. Just dig a hole big enough to put the starter in


And then cover it up and water!


And viola! You've got a good sturdy start to growing your veggies!


Thanks for stopping by! 


Tuesday, July 16, 2013

DIY Seed Starters!

Last year we spent a bunch of money on seeds and seed starter kits and ended up with shriveled up patch of garden, it was very frustrating putting in the hard work and money and coming up empty handed. So this year we are keeping it simple. I've bought a couple of tomato, bell pepper and cantaloupe plants, and only growing a few things from seed. I knew that there had to be a way to make seed starters so I went to looking on Pinteest and found these toliet paper roll seed starters! I had already been saving our paper rolls with no project in mind so this was perfect for me! And we still had some soil leftover from making our compost bin so I had everything I needed! I LOVE it when that happens! This is what you will need: 

- Toliet paper or paper towel rolls
- Scissors
- Tape
- A plate or tray
- Soil
- Seeds of your choice

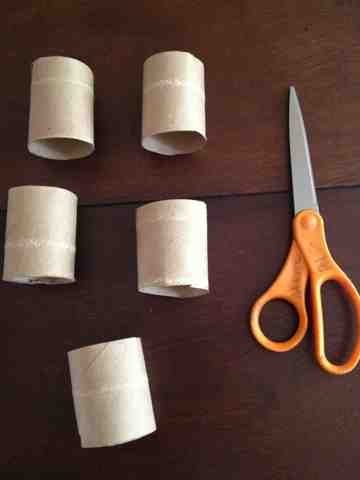
First you will need to cut your rolls.


Or


Next you will need to cut one of the new pieces about an inch up


You will need to do this 4 times


Now you will need to fold the cut slits over onto each other closing up one end of the roll


Place a piece of tape over the bottom to ensure it will stay closed


Now you have this


Fill it with soil


And plant your seeds according to their instruction. I marked mine with a marker because I'm planting two different seeds


When you have finished making and filling all your seed starters water them and put your tray in the sun!


If you notice one of mine came undone after watering. I just got out my handy hot glue gun and put a dab of glue and that has seemed to fix it!

The BEST part about it is when it's time to transplant them you can just plant the whole thing in your garden! Cool, right?!


Monday, July 8, 2013

Shoo Fly Don't Bother Me! : Home Remedy

I LOVE summer, but with summer comes bugs; and bugs I don't love. Last year we battled roaches, (thankfully we lost them with the move) this year it's flies! A bit less disgusting but much much more annoying! I have tried just about everything to rid our house of these pests and I was just about to give up. I bought Basil plants because one websites suggestion, this had no effect. I tried the "tried and true" water filled ziplock bags. I put them on either side of our backdoor. And I do think that it kept a few from coming inside but didn't stop them. I made a couple traps. I saw a few websites suggest Orginal Dawn dish soap and White Vinegar in mason jars. This caught one or two house flies but was mostly disappointing. I also made one out of a plastic bottle. You cut the top of the bottle, invert it and pour apple cider vinegar inside. This did nothing for our house flies but for a week or two we also had gnats and this worked fairly well for them. If you are battling gnats I would suggest trying this trap, you can find a similar tutorial over at Cheat Day Cafe (link below). And just when I had given up hope one of my Facebook friends liked a photo of whole cloves stuck into lemons as a fly repellent. Why not try it, right?! So the next time we went to the grocery store I picked up a couple lemons and a bottle of whole cloves. And I must say I am impressed! We no longer have flies buzzing around our heads!! I don't know where they have gone (and I've had my eye out) but they aren't around these lemons! I made 3 of them. 

I placed two in the kitchen and one near our couch. And they smell soo good! I'm thinking about making up some more and putting them in a bowl on our coffee table for a little splash of summer color. They look cool, smell amazing and actually keep the flies away! Yay! 

Anyone else battling bugs this summer? What do you do to keep the peace?

You can find that tutorial here --> http://cheatdaycafe.blogspot.com/2009/09/how-to-get-rid-of-fruit-flies.html?m=1