We had a pretty good sized Nandina in our front flower bed that had to be removed before I could plant our goodies. While Phillip was at work last Monday I decided to get to work! This lil project ended up being an all day workout! If you ever have a Nandina that must be removed I would recommend doing so while the hubs is home! (Or get him to do it!) For those of you who don't know, this is a Nandina

And this is one stubborn bitch! It has a huge system of viney roots that ran through our whole flower bed. I started by pulling up as many as I could around the plant. They were coming up fairly easy so I thought that maybe I could just kinda pull the whole thing up, BOY WAS I WRONG! After staring at for a bit I decided the best thing to do was to cut off all the foliage so I could see what I was working with. I then naively started to try and dig it up, this is when I realized what I really got myself into.

I started working on the little vines coming out from the main root. Pulling them out or at least disconnecting them from the center. An hour or so later I FINALLY started to get to the main problem.

By this point my whole body was sore so it was time for a break! My back was killing me and I needed to lay down but by this point I was far too dirty to lay anywhere inside; so I took a blanket outback and laid down for a bit.

And then it was back to work! I tried pulling on more vines but that was getting VERY tiresome and really not working much anymore, so I took my aggravation and put it to good use with the shovel! I started using all my might to throw the shovel down into the roots to break them. I did this all around the root base and freed it of all it's exposed vines. Once the root base was as free as I could get it, I started digging around it. I finally started to see the main bulbs! And just in time too; I was well over 2 hours in and I was almost fed up! I worked hard for another 30 minutes and I FINALLY got them bitches up!

YAY!!!!! 3+ hours later...

Those are all the roots I pulled up! And as tired as I was I couldn't stop there. I now had somewhere to plant all my pretty gifted foliage! So I started working on planting while Mijo kept me company.


(There is an elephant ear bulb planted in the void there)

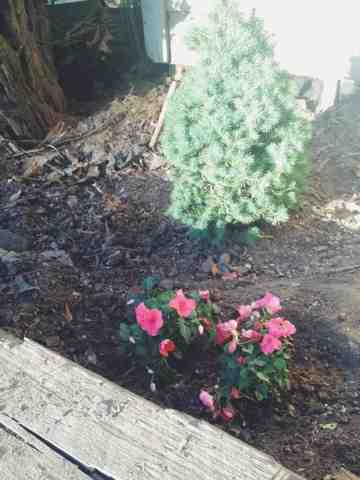

I was sore for the next four days! And I'm pretty sure all the pulling on vines bruised my right hand. But my front flower bed will look awfully nice once everything grows in :). There's something quite satisfying about finishing a hard days work, isn't there? Getting to stand back and say "That was hard as fuck! But I did it!" Has anyone else conquered the Nandina bush?!

