Showing posts with label Garden. Show all posts

Friday, May 9, 2014

Bits N Pieces of The Bennett Garden: Final Planting Phase


We tilled the whole plot by hand. It took a lot of time and body aches but I really feel like the more love and hard work you put into your garden the better your produce will be :)


Houdini LOVES to help...of course.


We tilled a few inches into the ground and then added 15 (1 cubic foot) bags of Miracle Grow Garden Soil, two 40lb bags of Cow Manure and three 40lb bags of Top Soil, with a little bit of Peet Moss.


I've got big plans this year, so I went ahead and got one of those pop green house thingys in addition to my DIY Seed Starters,


Initially we didn't till all the way to the end of the bed on one side because it can get pretty soggy; we ended up using the bag of Miracle Grow we saved and planted some flowers and herbs.


What better way to relax after a day in the yard than by sitting by a fire with the person you love?!

Are you guys gardening this year?!


Bits n Pieces is a blog post series that Miss James over at Bleubird Vintage features on her blog. If you haven't checked out her space yet, do it. Her photos, family and home are oh so lovely!

Monday, April 7, 2014

The Bennett Garden : Stage 1 & 2

I have wanted a garden for years now. These last two years we attempted it but the first year we started too late and last Summer was so hot it faught to keep my few plants in containers alive. This year we are doing it right!

I made my DIY seed starters about two weeks ago. I tried leaving them outside and I think they got too cold so I did a second round about a week ago and have them in the window in my craft room and taking them outside on nice days.

{You can find the How To for my DIY Biodegradable Seed Starters here.

image

image

Thankfully my Mom works at Home Depot who was having a Black Friday in April sale and we got our 15 landscaping timbers for $25! We then went back and bought a bunch of Miracle Grow Garden Soil, Top Soil and Cow Manure on sale as well. So far we have just put everything where it's supposed to be. Phillip is going to bolt everything down Tuesday and I'm going to start tilling up the land today. Here's some pictures of our progress so far!

image

image

image

image

image

I marked the bed with sticks so we wouldn't have to remeasure everytime we moved them.

image

image

image

We picked these head board pieces down the road from our house on a walk one day. We got the idea to possibly use them at the end of the bed. We are going to make a fence around the garden to keep Houdini out (he loves fruits and veggies!)

[While Phillip was home on his break we discussed the fence some more: I really want to be able to lean over the edge and work; with a fence I wouldn't be able to do that. So I think we are going to try it without the fence, at least till the plants mature. I'm thinking the edging will be enough to keep him out...at least till they start bearing fruit.]

image

Next step : Till the ground and add in our Garden Soil, Top Soil and Manure. This is going to be a feat because we are doing it by hand. But we love a good challenge and I believe the more love and hard work you put into the ground the better your garden will be. Well I'm off to start tearing up some dirt! See you guys soon!

image

Tuesday, July 16, 2013

DIY Seed Starters!

Last year we spent a bunch of money on seeds and seed starter kits and ended up with shriveled up patch of garden, it was very frustrating putting in the hard work and money and coming up empty handed. So this year we are keeping it simple. I've bought a couple of tomato, bell pepper and cantaloupe plants, and only growing a few things from seed. I knew that there had to be a way to make seed starters so I went to looking on Pinteest and found these toliet paper roll seed starters! I had already been saving our paper rolls with no project in mind so this was perfect for me! And we still had some soil leftover from making our compost bin so I had everything I needed! I LOVE it when that happens! This is what you will need: 

- Toliet paper or paper towel rolls
- Scissors
- Tape
- A plate or tray
- Soil
- Seeds of your choice

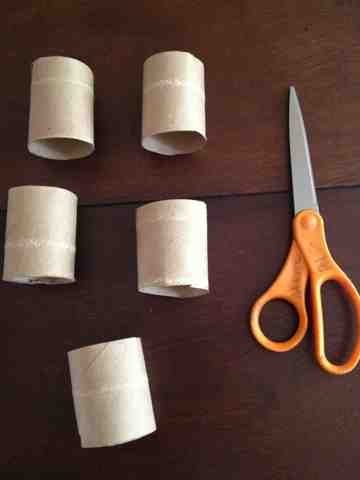
First you will need to cut your rolls.


Or


Next you will need to cut one of the new pieces about an inch up


You will need to do this 4 times


Now you will need to fold the cut slits over onto each other closing up one end of the roll


Place a piece of tape over the bottom to ensure it will stay closed


Now you have this


Fill it with soil


And plant your seeds according to their instruction. I marked mine with a marker because I'm planting two different seeds


When you have finished making and filling all your seed starters water them and put your tray in the sun!


If you notice one of mine came undone after watering. I just got out my handy hot glue gun and put a dab of glue and that has seemed to fix it!

The BEST part about it is when it's time to transplant them you can just plant the whole thing in your garden! Cool, right?!